How to Fix a Loose Faucet Base
If your faucet has a loose base, there are a few things you can do to fix it. First, try tightening the screws that hold the base in place. If that doesn’t work, you may need to replace the washers or gaskets.
You can also try using plumber’s putty to fill any gaps between the base and the countertop.
- Unscrew the faucet handle from the base using a Phillips screwdriver
- Insert the tip of a flathead screwdriver into the small hole in the center of the escutcheon, located beneath the handle
- Pry off the escutcheon by gently twisting the screwdriver until it pops off
- Inspect the O-ring and rubber washer on the back ofthe valve stem for any cracks or damage and replace if necessary
- Tighten each ofthe screws onthe valve stem using a Phillips screwdriver until snug, but be careful not to overtighten and strip them
- Screwthe faucet handle back onto its base and turn it clockwise until tight
How to Fix a Loose Bathroom Faucet Base
If your bathroom faucet has a loose base, there are a few things you can do to fix it. First, try tightening the bolts that hold the faucet to the counter. If that doesn’t work, you may need to replace the washers.
To do this, turn off the water supply and remove the faucet handle. Then, use a wrench to remove the nuts that hold the valve in place. Remove the old washers and replace them with new ones.
Be sure to put the rubber washer on first, followed by the metal washer. Tighten everything back up and turn on the water supply. Test your faucet to see if it’s working properly.
How to Tighten a Loose Single Handle Kitchen Faucet Base
A single handle kitchen faucet is a great way to update your kitchen without having to do a complete remodel. But what happens when the base of your faucet becomes loose? Don’t worry, it’s an easy fix!
Here’s how to tighten a loose single handle kitchen faucet base:
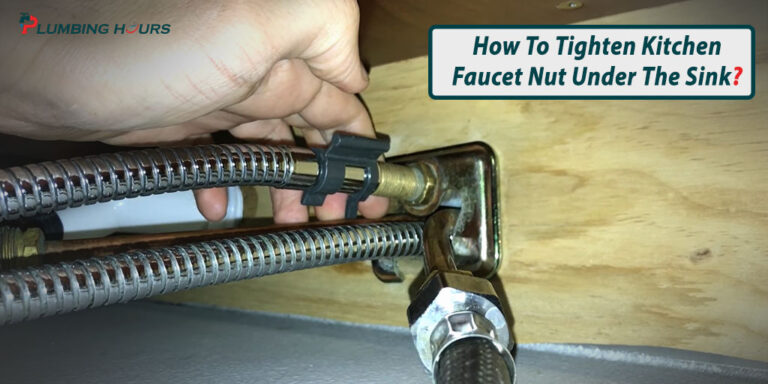
1. Start by turning off the water supply to your faucet. This is usually done by shutting off the valves under your sink.
2. Next, remove the decorative cap on the top of your faucet handle. Use a flat head screwdriver to gently pry it off.
3. Now you should see a small setscrew underneath the cap.
Use a Phillips head screwdriver to tighten this until it’s snug against the base of the handle.
4. Finally, replace the decorative cap and turn on your water supply valves. Test out your faucet to make sure it’s working properly again!
How to Tighten Moen Kitchen Faucet Base
If you have a Moen kitchen faucet that is loose, you can fix it yourself without having to call a plumber. All you need is a wrench and some patience.
First, locate the setscrew on the underside of the faucet base.
This is usually hidden by a small cap. Once you remove the cap, use a wrench to turn the setscrew clockwise until it is tight.
If your Moen faucet still feels loose after tightening the setscrew, there may be another problem.
Check to see if the O-ring around the outside of the spout is damaged or missing. If so, simply replace it with a new one.
With these simple steps, you can tighten your Moen kitchen faucet base and stop that annoying dripping noise!
Loose Faucet Handle No Set Screw
If your faucet handle is loose and there is no set screw, don’t worry – you can still tighten it up. All you need is a little know-how and the right tools.
First, locate the small hole near the base of the handle.
This is where the set screw would normally be located. Using a small screwdriver or Allen wrench, insert it into the hole and turn clockwise until tight.
If there still seems to be some play in the handle, try removing the handle entirely and re-tightening the retaining nut underneath.
Just make sure not to over-tighten, as this could damage the finish on your faucet.
With a little patience and effort, you should be able to get that pesky loose faucet handle tightened up in no time!
How to Tighten Kitchen Faucet Handle
If your kitchen faucet handle feels loose, it’s probably because the set screw that holds the handle in place has come loose. To tighten a kitchen faucet handle, start by removing the decorative cap from the top of the handle. Then, use a hex key to loosen the set screw and remove the handle.
Once the set screw is removed, you’ll be able to see a metal sleeve inside the faucet body. Use a wrench to tighten this sleeve until it’s snug against the inside of the faucet body. Finally, replace the handle and tighten the set screw with a hex key.
Credit: www.youtube.com
How Do You Fix a Wobbly Kitchen Faucet Base?
If your kitchen faucet has a wobbly base, there are a few things you can do to fix it. First, try tightening the screws that hold the faucet in place. If that doesn’t work, you may need to replace the washers or O-rings.
You can also try using plumbers’ putty to secure the faucet base.
How Do You Seal the Base of a Faucet?
When it comes to plumbing, one of the most important things you can do is seal the base of your faucet. This will help prevent any water damage that could occur if there was a leak. There are a few different ways you can seal the base of your faucet, but the most common and effective way is with plumber’s putty.
Plumber’s putty is a clay-like substance that is used for sealing around plumbing fixtures. It is easily moldable and forms a tight seal when it dries. To use plumber’s putty, simply apply it around the base of your faucet and then tighten the nuts or bolts holding your faucet in place.
The putty will ooze out slightly as you tighten the hardware, but this is normal and just means that it’s doing its job.
Once you have sealed the base of your faucet with plumber’s putty, be sure to wipe away any excess material before it has a chance to dry. You can also use a silicone caulk or rubber gasket to seal your faucet, but these materials are not as effective as plumber’s putty and should only be used if you cannot find anyPutty.
.
How Do You Fix a Loose Faucet Stem?
In order to fix a loose faucet stem, you will need to:
-First, turn off the water to your sink. You can do this by turning the knob clockwise until it stops.
-Next, use a wrench to remove the handle. Be careful not to strip the finish.
-Then, remove the packing nut by unscrewing it counterclockwise with a wrench.
-Once the packing nut is removed, pull out the stem and inspect it for damage.
-If the stem is damaged, you will need to replace it. If not, simply wrap Teflon tape around the threads and screw it back in place.
-Finally, reassemble everything in reverse order and turn on the water supply.
Should You Silicone around Faucet Base?
If you’re planning to install a new faucet or replace an old one, you may be wondering if you should use silicone sealant around the base. There are a few things to consider when making this decision.
First, it’s important to know that most faucets come with a rubber gasket already in place.
This gasket helps create a watertight seal between the faucet and the countertop. If your faucet has this gasket, there’s no need to add silicone sealant as well.
However, there are some cases where using silicone may be necessary.
For example, if your faucet doesn’t have a pre-installed gasket, or if the existing gasket is damaged, you’ll need to use silicone to create a watertight seal.
Another thing to keep in mind is that silicone can make it difficult to remove a faucet later on. So if you’re not sure whether or not you’ll need to remove the faucet in the future, it’s probably best to avoid using silicone.
Overall, whether or not you use silicone around your faucet base is up to personal preference. If you’re not sure what’s best for your project, consult with a professional plumber or contractor for advice.
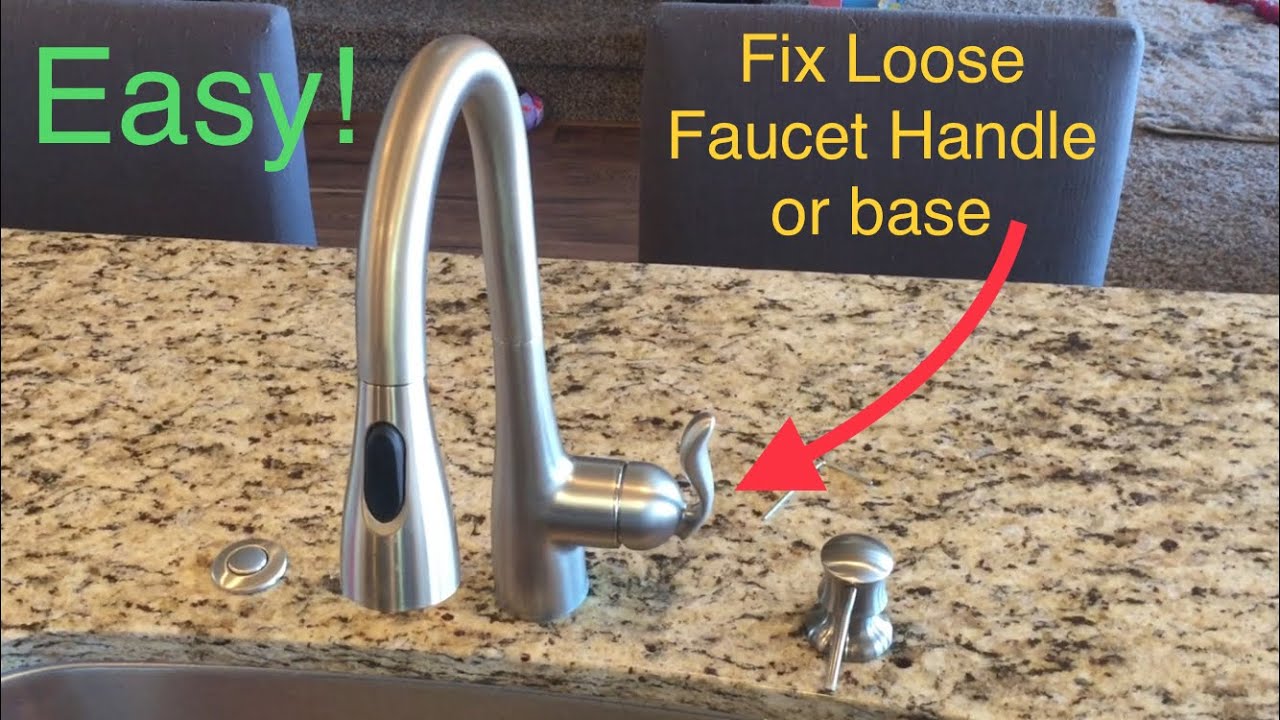
How to fix loose Kitchen Faucet. DIY. #165
Conclusion
If your faucet has a loose base, there are a few easy ways to fix it. First, try tightening the screws that hold the base to the counter. If that doesn’t work, you can try using plumber’s putty or silicone caulk to seal the gap between the base and the counter.
If your faucet still feels loose after doing these things, you may need to replace the entire faucet.