How to Remove a Moen Kitchen Faucet
To remove a Moen kitchen faucet, first disconnect the water supply lines. Next, use a wrench to loosen the nuts that secure the faucet to the sink. Finally, lift the faucet up and out of the sink.
- Moen faucets are designed to be easy to remove without the use of tools
- To remove your Moen kitchen faucet, start by turning off the water supply to the faucet
- Next, use a putty knife or flat-head screwdriver to pry off the decorative cap located under the handle
- Once the cap is removed, you will see a small retaining clip
- Use needle-nose pliers to remove this clip and then lift off the handle itself
- With the handle removed, you should now be able to see a large nut holding the faucet in place
- Use an adjustable wrench or socket wrench to loosen and remove this nut (be sure to catch any washers that may fall out)
How to Remove a Moen Kitchen Faucet With Sprayer
If your Moen kitchen faucet is leaking or you simply want to replace it, you’ll need to remove the old one first. This process is fairly easy to do and only requires a few tools. Here’s how to remove a Moen kitchen faucet with sprayer:
1. Turn off the water supply valves under the sink. Then open the faucet to release any remaining water pressure.
2. Disconnect the sprayer hose from the side of the faucet using an adjustable wrench.
3. Use a Phillips screwdriver to remove the screws that secure the escutcheon plate to the sink. This will expose the mounting nuts for the faucet.
4. Use an adjustable wrench or socket wrench to loosen and remove the mounting nuts, then lift out the old faucet assembly.
If there are any rubber gaskets or plumbers putty on the underside of the old faucet, be sure to scrape these away before installing the new one.
5 . Reverse these steps to install your new Moen kitchen faucet with sprayer!
How to Remove a Moen Kitchen Faucet Handle
If your Moen kitchen faucet is leaking or you just want to change the look of your sink, you may need to remove the handle. This process is relatively simple and only requires a few tools. With a little patience, you can have that old faucet handle off in no time.
What You’ll Need:
* Screwdriver
* Wrench (optional)
Instructions:
1. Locate the setscrew on the underside of the Moen kitchen faucet handle. This is usually a small Phillips head screw.
2. Use a screwdriver to remove the setscrew and take off the handle. If the setscrew is difficult to remove, try using a wrench for added leverage. Just be careful not to strip it.
3. Once the handle is off, you should see a threaded sleeve underneath with another Phillips head screw in the center. Remove this screw as well and pull off the sleeve.
Moen Kitchen Faucet Removal Tool
If you need to remove your Moen kitchen faucet, you will need a special tool. This tool is called the Moen Kitchen Faucet Removal Tool. It is a small, handheld tool that helps to loosen and remove the Moen kitchen faucet from the sink.
The removal tool is easy to use and comes with clear instructions.
To use the removal tool, first make sure that the power to the sink is turned off. Next, locate the two screws that hold the handle in place on top of the faucet.
Using the removal tool, loosen these screws until they are loose enough to be removed by hand. With the screws removed, you should now be able to pull off the handle.
Underneath the handle, there is a washer and a nut holding the faucet in place.
Use the removal tool to loosen these two pieces so that they can be removed by hand as well. With these last two pieces removed, you should now be able to lift off the entire faucet assembly from your sink!
Remove Moen Kitchen Faucet Without Tool
If your Moen kitchen faucet is leaking, you may be able to repair it without having to call a plumber. In most cases, you can fix a leaky Moen kitchen faucet by replacing the O-ring seals. You’ll need to have a few tools on hand to do this, but in most cases, you won’t need any special Moen removal tool.
To remove your Moen kitchen faucet, start by shutting off the water supply to your sink. Then, use a wrench or pliers to loosen the nuts that secure the faucet to the sink. Once the nuts are loose, you should be able to pull the faucet up and away from the sink.
Once you have removed the faucet, take a look at the O-ring seals. These are usually located under the escutcheon plate (the decorative plate that covers the hole in your sink). If these seals are damaged or worn out, they will need to be replaced before you reassemble and reinstall your faucet.
To replace the O-ring seals, simply remove them from their seats and press new ones into place. Make sure that they are seated properly before proceeding. Once all of the seals are in place, you can reassemble your Moen kitchen faucet and reinstall it on your sink.
Be sure to tighten all of the nuts securely before turning on the water supply again.
Kitchen Faucet Removal Problems
If you’re having problems removing your kitchen faucet, there are a few things you can try. First, make sure that the faucet is turned off at the water supply. Next, take a look at the base of the faucet to see if there are any screws or bolts holding it in place.
If so, remove these and then try to pull the faucet up from the sink. If the faucet still won’t budge, you may need to use a plunger or a pliers to loosen it. Be careful not to damage the sink while you’re doing this.
Once you’ve finally removed the stubborn faucet, make sure to clean up any debris before installing a new one.
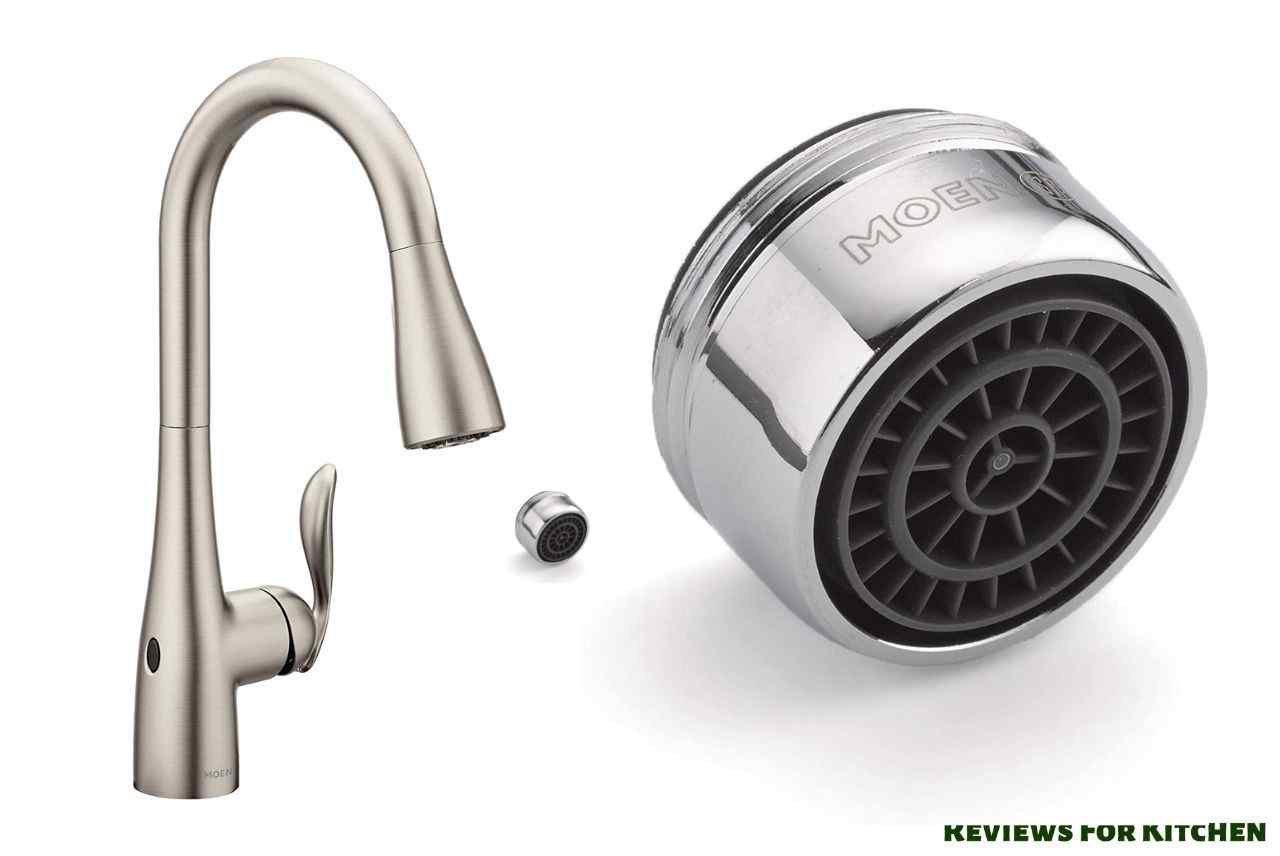
Credit: www.bestreviewsforkitchen.com
How Do You Remove a Moen Single Handle Kitchen Faucet?
Moen is one of the most popular manufacturers of kitchen faucets, and their single handle models are some of the most commonly used. If you’re looking to replace or remove your Moen single handle kitchen faucet, there are a few things you need to know.
The first thing you need to do is shut off the water supply to your sink.
There should be a shut-off valve under your sink, so locate that and turn it clockwise to close it. Once the water is shut off, open up your faucet and let any remaining water drain out.
Now it’s time to start taking apart your faucet.
Begin by removing the decorative cap on top of the handle. Underneath this cap, you should see a hexagonal nut. Use an appropriate sized wrench or socket to loosen and remove this nut (counterclockwise).
With the nut removed, you should now be able to pull off the handle itself.
Underneath the handle, you’ll see anothernut holding on acircular metal plate calledthe escutcheon. Again, use a wrench/socketto loosenandremovethisnut(counterclockwise),thenpullofftheescutcheonplateas well.
At this point,you’ll have full access toyourfaucet’svalveassembly- whichis what we’llbe workingon next!
Thereare two different typesof valvesusedin Moensinglehandlekitchenfaucets:cartridgevalvesand disc valves.To tell themapart,look at how theyattach tothesink basin:cartridgevalves willhavea threadedshankthat goes througha hole inbasin while disc valves will sit directlyon topofthe basin with no visiblethreading..
If yours is a cartridge valve (most common), then removing it is relatively straightforward: simply unscrew the retaining nut holding it in place (counterclockwise) and pull it out . If yours is a disc valve , then things are a bit more complicated as you’ll need to disassemble the entire valve assembly in order to remove it . We won’t go into detail here as there are too many variations , but consult your owner’s manual or contact Moen customer service for assistance .
Onceyou have full access toyourfaucet’svalveassembly ,it’s time toget startedonreplacingorremovingit!
How Do You Remove a Moen Kitchen Faucet Handle Without Visible Screws?
If you’re trying to remove a Moen kitchen faucet handle and you don’t see any screws, don’t worry – there’s an easy way to do it. All you need is a hex key (also called an Allen wrench).
First, look for a small hole in the center of the handle.
This is where the set screw is located. Insert the hex key into the hole and turn it counterclockwise until the set screw comes loose.
Once the set screw is removed, you should be able to pull the handle off easily.
If it’s stubborn, try wiggling it back and forth until it comes free.
And that’s all there is to it! With a little patience, you can remove any Moen kitchen faucet handle without having to resort to visible screws.
How Do You Remove a Kitchen Faucet With U Shaped Bracket?
Removing a kitchen faucet with U shaped bracket is a simple process that can be completed in just a few minutes. First, you will need to turn off the water supply to the faucet by shutting off the valves under the sink. Next, use a wrench to loosen the nuts that secure the U shaped bracket to the sink.
Once these nuts are loose, you can remove the entire faucet assembly from the sink. Finally, use a putty knife to scrape away any old plumbers putty that may be present on the sink and then clean it up with soapy water.
What is the Easiest Way to Remove a Kitchen Faucet?
Assuming you are asking about a sink faucet and not a sprayer or other type of faucet:
The easiest way to remove a kitchen faucet is to first shut off the water supply lines. Once the water is shut off, you can remove the screw caps that hold the faucet in place.
After removing the screws, you can pull the faucet up and out of the sink.
Moen Circa 2008 Kitchen Faucet Removal
Conclusion
If your Moen kitchen faucet is giving you trouble, it may be time to remove it and replace it with a new one. Luckily, this process is relatively simple and can be done in a few minutes with the right tools.
First, turn off the water supply to your sink and open the faucet to release any residual water pressure.
Next, use an adjustable wrench to loosen the large nut beneath the sink that secures the faucet in place. With the nut loosened, you should be able to pull the faucet up and out of the sink.
Once the old faucet is removed, take a moment to clean up any debris or grime that has accumulated around the sink’s mounting holes.
This will help ensure a tight seal for your new faucet. Finally, reverse these steps to install your new Moen kitchen faucet – no plumber required!