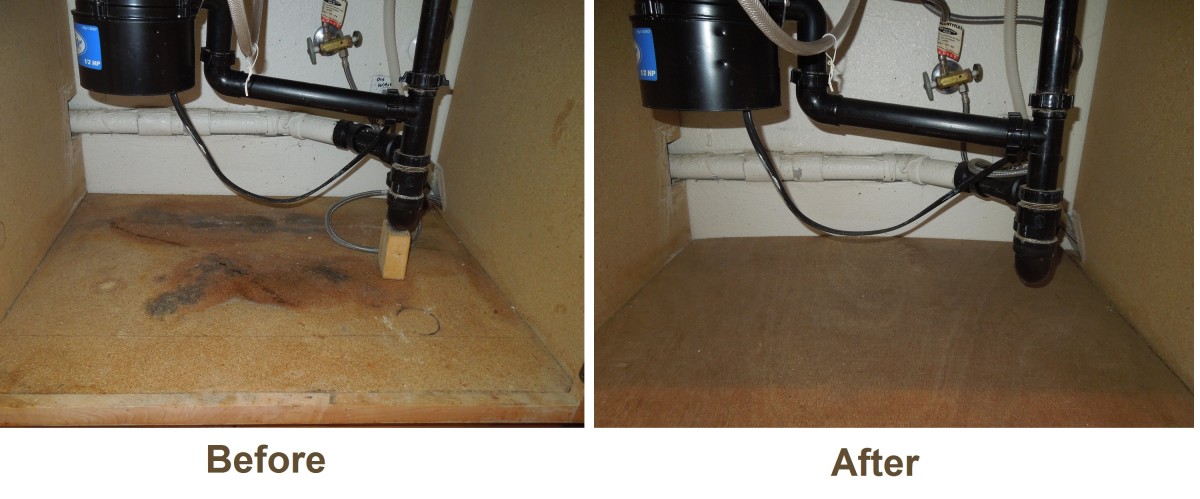
Replace Wood under Kitchen Sink
If your kitchen sink is starting to show signs of wear and tear, it may be time to replace the wood underneath. You can do this yourself by following these simple steps.
1. First, remove the old wood by unscrewing the screws that hold it in place.
Be careful not to damage the surrounding area as you do this.
2. Next, measure the space where the new wood will go and cut it to size accordingly.
3. Once you have your new piece of wood, screw it into place using long screws so that it is secure.
4. Finally, caulk around the edges of the new wood to ensure a watertight seal.
If you’re like most people, your kitchen sink sees a lot of action. Over time, the wood underneath can start to show signs of wear and tear. When this happens, it’s time to replace the wood.
Here’s how to do it:
1. Remove the old wood. This is usually held in place with screws or nails.
Carefully remove them so you don’t damage the surrounding area.
2. Measure and cut the new piece of wood to size. Make sure it’s a tight fit so there are no gaps.
3. Secure the new wood in place with screws or nails. You may need to predrill holes first depending on the material you’re using. Be careful not to over tighten, which could damage the surrounding area again.
4 .
Replace Particle Board under Sink
If your home was built in the 1970s or later, there’s a good chance the cabinets under your sink are made from particle board. While this material is inexpensive and easy to work with, it’s not very durable. Water can cause the particle board to swell and break down, leaving you with a mess to clean up.
If your particle board cabinets are starting to show signs of wear, it’s time to replace them. Here’s how to do it:
1. Remove the cabinet doors and any hardware.
If you’re planning on painting or staining the new cabinets, now is a good time to do that as well.
2. Cut new pieces of plywood or hardwood to fit the openings where the particle board was. You may need to use a saw if the openings are not square.
3. Attach the new wood pieces using screws or nails and then reattach the cabinet doors using hinges . Make sure everything is level and plumb before moving on . Use shims if needed .
Trim off any excess wood . Add new door pulls or knobs if desired . Reinstall any shelves that were removed earlier .
Replace under Sink Cabinet Floor
Assuming you would like a blog post discussing how to replace the floor of an under sink cabinet:
“If your under sink cabinet’s floor is looking a little worse for wear, don’t worry – it’s a relatively easy fix! Here’s what you’ll need to do:
1. Remove everything from the cabinet. This includes any shelves or drawers, as well as any contents on those shelves or in those drawers.
2. Use a screwdriver or drill to remove the screws holding the cabinet together.
If your cabinet is glued together, you may need to use a putty knife to pry it apart. Be careful not to damage the rest of the cabinet while doing this.
3. Once the cabinet is disassembled, remove the old flooring material.
This may be plywood, particle board, or something else entirely. If possible, save this piece of wood so that you can use it as a template for cutting out the new piece.
Best Wood for under Kitchen Sink
When it comes to finding the best wood for under your kitchen sink, there are a few things you need to take into consideration. The first is the amount of moisture that will be present. If you know your kitchen tends to be on the drier side, then you can opt for a harder wood like maple or oak.
However, if moisture is more of a concern, then a softer wood like pine would be a better option.
Another thing to consider is the type of finish you want on your wood. If you prefer a natural look, then unfinished woods like cherry or walnut would be ideal.
However, if you want something that’s more low-maintenance, then finished woods like bamboo or laminate might be better suited for your needs.
Finally, think about what kind of budget you have to work with. Woods like mahogany and teak tend to be more expensive, but they’re also very durable and beautiful.
If cost is a major concern, then cheaper options like particle board or MDF may be worth considering.
No matter what kind of wood you choose, make sure it’s one that will complement the overall style of your kitchen. With so many different options available, there’s sure to be something out there that’s perfect for your space!
How to Repair Water Damage under Kitchen Sink
If you have water damage under your kitchen sink, it’s important to take care of it right away. Water damage can lead to mold and mildew growth, which can be dangerous for your health. Here are some tips on how to repair water damage under your kitchen sink:
1. Find the source of the leak and fix it. This may require calling a plumber if the leak is coming from a pipe or fixture.
2. If there is standing water, remove it with a wet/dry vacuum or mop it up with towels.
3. Use a dehumidifier or fan to help dry out the area.
4. Clean any mold or mildew growth with bleach or another cleaner made specifically for mold and mildew removal.
5. Once the area is dry and clean, apply a waterproof sealant to prevent future water damage.
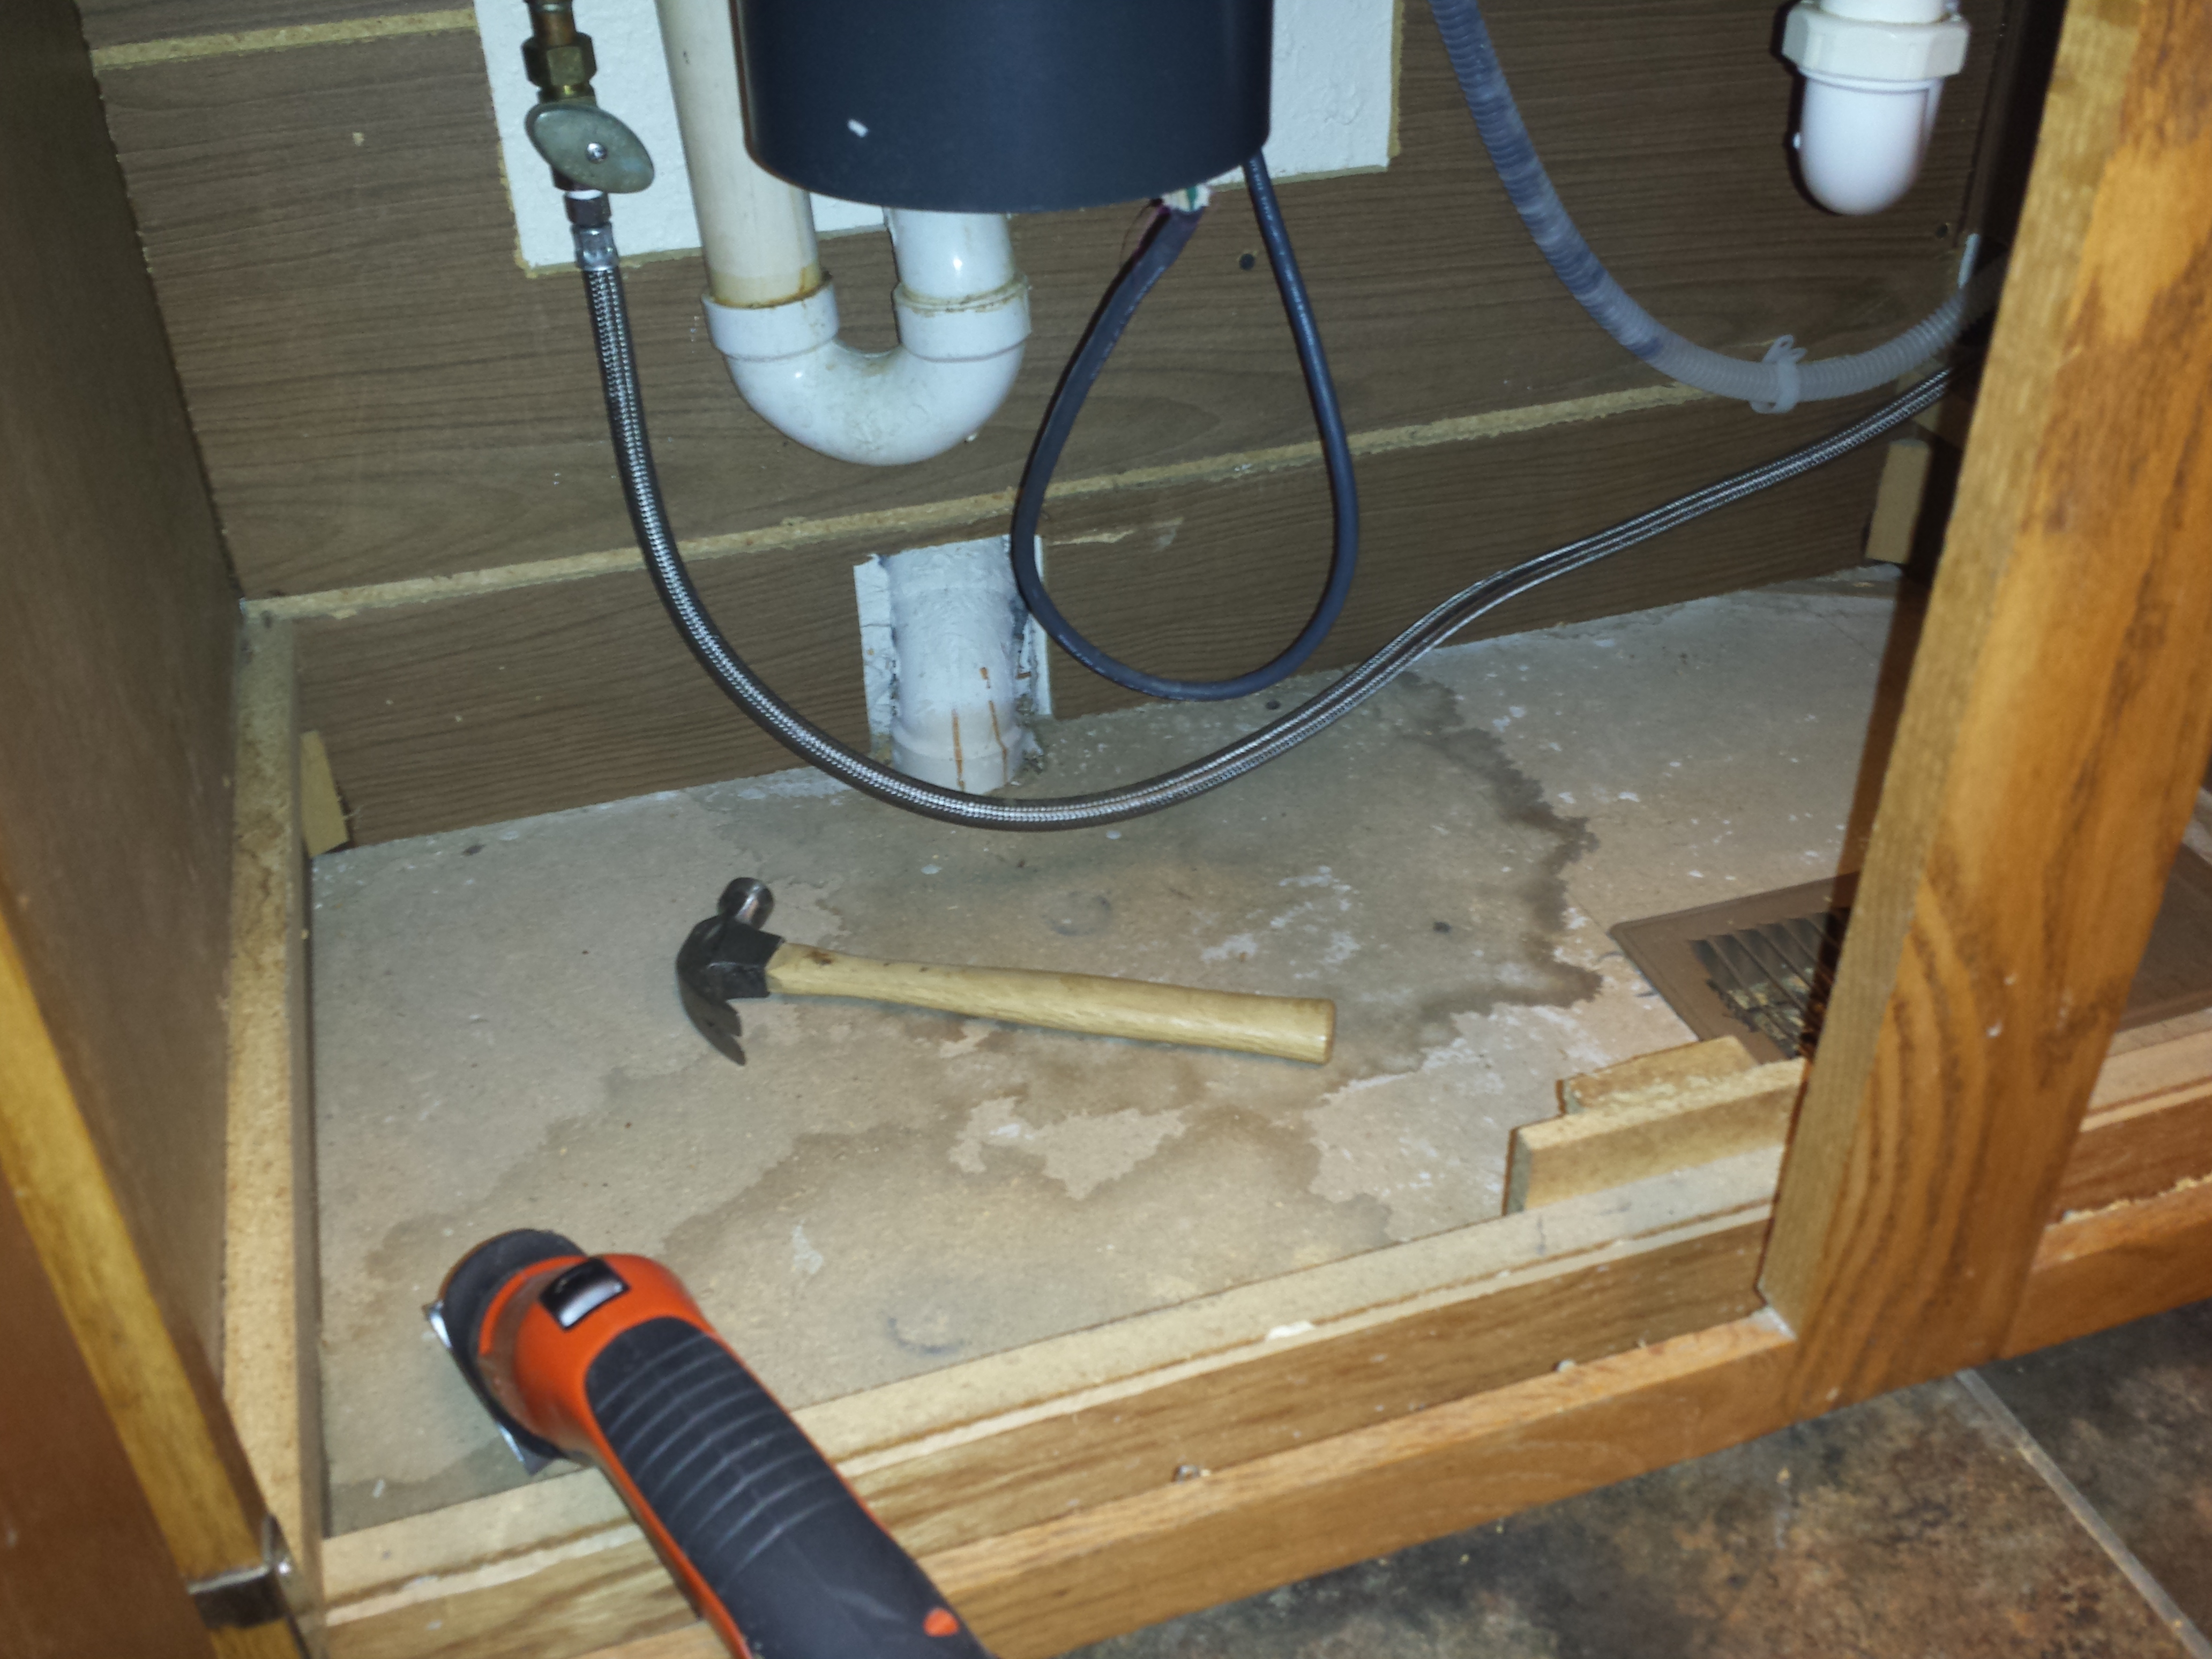
Rotted Wood under Kitchen Sink
If you’re like most people, you probably don’t give much thought to the wood under your kitchen sink. But if that wood is starting to rot, it’s time to take action! Rotted wood can lead to all sorts of problems, including water damage, mold growth, and even insect infestations.
So what causes wood to rot? There are several culprits, but the most common is moisture. When wood gets wet, it starts to break down and decay.
This process is accelerated by warm temperatures and darkness (which is why basements are often plagued by rotting wood).
There are a few telltale signs of rotting wood. If the wood feels spongy or crumbly, or if it has visible mold growth, it’s probably time to replace it.
You can usually do this yourself with some basic carpentry skills and a trip to the hardware store.
Once you’ve replaced the rotten wood, be sure to take steps to prevent future problems. Make sure there’s proper ventilation under your sink (a exhaust fan can help with this), and try not to let any water stand for too long in that area.
With a little care, you can keep your kitchen sink area safe and sound for years to come!
Credit: www.representingdads.com
How to Replace the Bottom Piece of Wood under My Kitchen Sink?
If your kitchen sink is leaking, chances are you need to replace the bottom piece of wood under the sink. This is a relatively easy repair that anyone can do with a few basic tools.
First, turn off the water to your sink and remove the drain plug so that any water in the pipes can drain out.
Next, use a putty knife or screwdriver to pry off the trim around the base of your sink. Once the trim is removed, you should be able to see the screws holding the bottom piece of wood in place. Remove these screws and carefully pull out the old piece of wood.
Now it’s time to install the new piece of wood. Begin by cutting it to size, then slip it into place and secure it with screws. Finally, reattach the trim around your sink and turn on the water supply.
Your leaky kitchen sink should now be fixed!
How Much Does It Cost to Replace Wood under Sink?
If you’re looking to replace the wood under your sink, there are a few things you’ll need to take into account. The cost of the replacement wood, the cost of any necessary tools, and the cost of labor if you’re not doing it yourself.
The cost of replacement wood will depend on the type of wood you’re using.
If you’re using a standard plywood, you can expect to pay around $20 for a 4′ x 8′ sheet. However, if you’re using a higher quality hardwood like cherry or maple, the cost can jump up to $60 or more for the same size sheet.
As for tools, you’ll need at least a saw and drill to complete this project.
If you don’t have these tools already, they can be purchased for around $100-$200 depending on the quality.
And finally, if you’re hiring someone to do this job for you, labor costs will vary depending on their experience and location. Expect to pay anywhere from $50-$100 per hour for professional installation.
All in all, replacing the wood under your sink is not a cheap endeavor. However, it is an important part of maintaining your home and keeping it looking its best.
What is the Board under the Sink Called?
The board under the sink is called a false front. It is used to cover up plumbing and/or electrical lines that run behind the sink. False fronts are typically made of wood or laminate and are screwed into place.
Can You Replace the Bottom of a Sink Cabinet?
If you’re planning on replacing the bottom of your sink cabinet, there are a few things you’ll need to take into account. First, you’ll need to measure the Cabinet to get an accurate idea of what size replacement piece you’ll need. Next, you’ll want to choose a material that will be durable and easy to clean.
Finally, you’ll need to install the new bottom using screws or nails. With a little bit of planning and some elbow grease, replacing the bottom of your sink cabinet is a relatively easy project.
How to replace rotted sink base cabinet floor bottom. Easy! Home Mender.
Conclusion
This is a great way to save money and update your kitchen. Replacing the wood under your sink is a quick and easy project that anyone can do. You’ll be amazed at the difference it makes in the look of your kitchen.
{ “@context”: “https://schema.org”, “@type”: “FAQPage”, “mainEntity”:[{“@type”: “Question”, “name”: “How to Replace the Bottom Piece of Wood under My Kitchen Sink? “, “acceptedAnswer”: { “@type”: “Answer”, “text”: ” If your kitchen sink is leaking, chances are you need to replace the bottom piece of wood under the sink. This is a relatively easy repair that anyone can do with a few basic tools. First, turn off the water to your sink and remove the drain plug so that any water in the pipes can drain out. Next, use a putty knife or screwdriver to pry off the trim around the base of your sink. Once the trim is removed, you should be able to see the screws holding the bottom piece of wood in place. Remove these screws and carefully pull out the old piece of wood. Now it’s time to install the new piece of wood. Begin by cutting it to size, then slip it into place and secure it with screws. Finally, reattach the trim around your sink and turn on the water supply. Your leaky kitchen sink should now be fixed!” } } ,{“@type”: “Question”, “name”: “How Much Does It Cost to Replace Wood under Sink? “, “acceptedAnswer”: { “@type”: “Answer”, “text”: ” If you’re looking to replace the wood under your sink, there are a few things you’ll need to take into account. The cost of the replacement wood, the cost of any necessary tools, and the cost of labor if you’re not doing it yourself. The cost of replacement wood will depend on the type of wood you’re using. If you’re using a standard plywood, you can expect to pay around $20 for a 4′ x 8′ sheet. However, if you’re using a higher quality hardwood like cherry or maple, the cost can jump up to $60 or more for the same size sheet. As for tools, you’ll need at least a saw and drill to complete this project. If you don’t have these tools already, they can be purchased for around $100-$200 depending on the quality. And finally, if you’re hiring someone to do this job for you, labor costs will vary depending on their experience and location. Expect to pay anywhere from $50-$100 per hour for professional installation. All in all, replacing the wood under your sink is not a cheap endeavor. However, it is an important part of maintaining your home and keeping it looking its best.” } } ,{“@type”: “Question”, “name”: “What is the Board under the Sink Called? “, “acceptedAnswer”: { “@type”: “Answer”, “text”: ” The board under the sink is called a false front. It is used to cover up plumbing and/or electrical lines that run behind the sink. False fronts are typically made of wood or laminate and are screwed into place.” } } ,{“@type”: “Question”, “name”: “Can You Replace the Bottom of a Sink Cabinet? “, “acceptedAnswer”: { “@type”: “Answer”, “text”: ” If you’re planning on replacing the bottom of your sink cabinet, there are a few things you’ll need to take into account. First, you’ll need to measure the Cabinet to get an accurate idea of what size replacement piece you’ll need. Next, you’ll want to choose a material that will be durable and easy to clean. Finally, you’ll need to install the new bottom using screws or nails. With a little bit of planning and some elbow grease, replacing the bottom of your sink cabinet is a relatively easy project.” } } ] }

