How to Remove Whisk from Kitchenaid Mixer
To remove the whisk from a Kitchenaid mixer, first twist it to the left to loosen, then pull it straight up. If the whisk is stuck, try spraying it with cooking oil and twisting again.
- Unplug your Kitchenaid mixer from the power outlet
- Remove the bowl from the mixer
- Use a spatula or other flat utensil to release the whisk from the bowl, being careful not to scratch the bowl
- Wash the whisk in hot, soapy water and dry thoroughly before using again
Can’T Remove Beater from Kitchenaid Mixer
If you can’t remove the beater from your Kitchenaid mixer, there are a few things you can try. First, make sure that the mixer is unplugged and that the beater is not locked into place. Next, try gently wiggling the beater while pulling it up.
If that doesn’t work, you may need to use a flathead screwdriver to help pry the beater loose. Finally, if all else fails, you can always contact Kitchenaid for assistance.
How to Take Bowl off Kitchenaid Mixer
Assuming you have a KitchenAid stand mixer:
1) Unplug the mixer.
2) Turn the speed control to “OFF.”
3) Lift the mixer head.
4) Insert a bowl lifter into one of the holes in the bottom of the mixing bowl. The other hole is for the power cord.
5) Center the bowl on top of the machine, locking it into place. Be careful not to touch the beaters or any moving parts. 6) Slowly lower the mixing head until it comes to rest on top of the bowl.
If your model has a pour shield, make sure it’s properly positioned over the opening in the mixing head so ingredients won’t splash out while you’re mixing.
How to Remove Whisk from Kenwood Mixer
If you have a Kenwood mixer and you want to remove the whisk, there are a few things that you need to do. First, you need to make sure that the machine is unplugged. Once the machine is unplugged, you will need to remove the bowl from the mixer.
After the bowl is removed, you can then unscrew the whisk from the base of the mixer.
How to Remove Beaters from Hand Mixer
If you’re like most people, your hand mixer probably gets a lot of use. Over time, the beaters can become caked with dried batter and other food debris. Not only does this make them difficult to clean, it can also impact the performance of your mixer.
Fortunately, there’s an easy way to remove the beaters from your hand mixer so you can give them a thorough cleaning.
To start, unplug the mixer and make sure the beaters are not attached to the power cord. Then, holding onto the end of each beater with one hand, gently push up on the spring-loaded release button with your other hand.
The beater should pop right out. If it’s stuck, try wiggling it back and forth until it comes loose.
Once you have removed both beaters, rinse them under warm water to remove any visible dirt or debris.
If they’re really dirty, you may need to scrub them with a soft-bristled brush or soak them in soapy water for a few minutes before rinsing again. Once they’re clean, dry them off and reattach them to your mixer before using it again.
Kitchenaid Mixer Attachments
There are a variety of attachments that can be used with a Kitchenaid mixer, depending on what you want to make. The most common attachments include the dough hook, which is great for kneading bread dough; the flat beater, which is perfect for mixing cake batter or frosting; and the wire whip, which is ideal for whipping egg whites or cream.
Each attachment has a specific purpose and can help you create different types of recipes.
For example, the dough hook is great for kneading bread dough because it helps to evenly distribute the ingredients and prevents the dough from sticking to the sides of the bowl. The flat beater is perfect for mixing cake batter or frosting because it ensures that all of the ingredients are well combined and there are no lumps. And finally, the wire whip helps to add air into egg whites or cream, resulting in lighter, fluffier textures.
So whether you’re looking to make bread, cakes, or something else entirely, there’s a Kitchenaid mixer attachment that can help you get the job done perfectly.
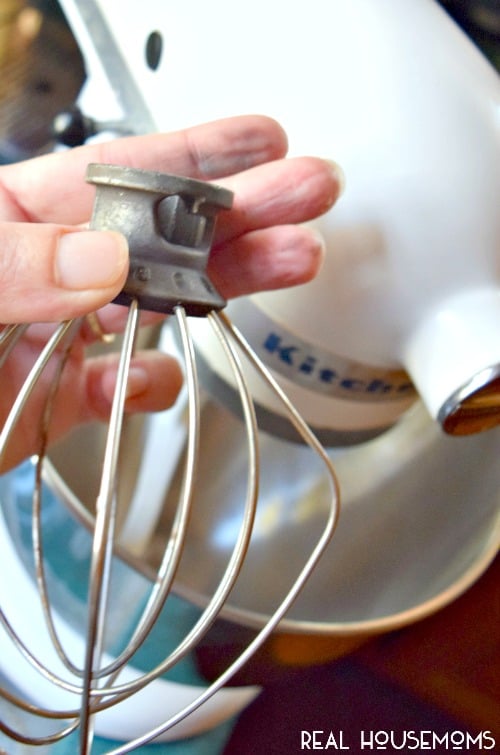
Credit: realhousemoms.com
How Do You Remove Attachments from a Hand Mixer?
Assuming you’re asking about a standard hand mixer with detachable beaters, the process is fairly simple. First, unplug the mixer from any power source. Then, remove the mixing bowl and set it aside.
Next, locate the release button or lever on the hand mixer – this is usually located near where the beaters attach to the mixer body. Press or flip this lever/button, and then gently pull the beaters away from the mixer body. Finally, wash all attachments (beaters, bowl, etc.) in warm soapy water and dry thoroughly before reassembling and using again.
How Do You Remove the Attachment from a Kitchenaid Slicer?
It is important to keep your Kitchenaid slicer clean and in good working condition. Part of routine maintenance is removing the attachments when they need to be cleaned. Here are the steps for removing the attachment from your Kitchenaid slicer:
1. Unplug the slicer from the power outlet.
2. Lift up on the release lever located on top of the carriage, behind the food pusher. This will unlock the carriage and allow you to slide it off of the track.
3. With the carriage removed, you will see two screws holding the attachment in place. Remove these screws with a Phillips head screwdriver.
4. The attachment can now be lifted off of the slicer base.
Be careful as there are sharp blades inside!
How Do You Attach a Beater to a Kitchenaid Mixer?
One of the most common questions we get here at the KitchenAid® Service Center is, “How do I attach my beater to my mixer?” We’re here to help clear things up!
There are two ways to attach your beater to your KitchenAid® Stand Mixer: the quick release method and the traditional method.
The quick release method is the easiest and quickest way to attach your beater. To do this, simply insert the beater shaft into the socket on the mixer body until it clicks into place. Then, twist the beater clockwise until it locks into position.
That’s it!
The traditional method is a bit more complicated, but some people prefer it because they feel like it gives them a more secure connection. To attach your beater using the traditional method, first insert the beater shaft into the socket on the mixer body until it clicks into place.
Next, use one hand to hold onto the base of the mixer while you use your other hand to twistthe beater clockwise until it locks into position. Once again, that’s it!
We hope this clears things up for you and makes attaching your beater a breeze!
How Do You Remove the Bowl from a Kitchenaid Artisan Mixer?
If you need to remove the bowl from your Kitchenaid Artisan mixer, there are a few simple steps you can follow. First, make sure that the mixer is unplugged and that the bowl is empty. Next, locate the release button on the back of the mixer.
This button will be located near the top of the mixer, on the left side. Once you have found the release button, press it in and twist the bowl counterclockwise until it comes loose from the mixer. If you have any trouble removing the bowl, consult your Kitchenaid Artisan mixer manual for more detailed instructions.
KITCHENAID ACCESSORY REMOVAL
Conclusion
If you have ever used a Kitchenaid mixer, you know that one of the most annoying things about them is getting the whisk out. It seems like no matter how careful you are, it always ends up getting stuck. But don’t worry, there is an easy way to fix this problem.
All you need to do is follow these simple steps and your whisk will come out easily every time.
1) First, make sure that your mixer is unplugged and the bowl is empty.
2) Next, take a butter knife or similar tool and insert it between the whisk and the bowl.
3) Gently twist the knife until the whisk comes loose. If it’s still stuck, try using a little more force.
4) Finally, pull the whisk out from the bottom of the mixer and rinse it off under running water.